today's post is a bit tricky to make, because what i am shooting today is white object on white background. there's only one that i found that was talking about this and he use studio lamp and some setup.
but, i have a different setup here, in my office, there's literally none, no studio nor space available to make that setup. so don't be discourage, i'm here to help for those who have trouble taking product photography indoor, office or home.
please read the post well, there's something that i need to talk about and i promise i'll be funny :).
so, what am i looking for? product photography that like stock photography, plain white background and an object, specifically feather (in this post). when i search "feather photography" all the result were artistic shot of a feather, so i'm search "white feather on white background" and found several photo that actually darken the feather.
white object is not really "white", it's our eyes that "think" that it is white. because our eye use "average metering" :), in term of dslr.
we calculate the surrounding color and light to make the color for the object we focus on. this calculation is actually use in some eye optical illusion, it think it's called chess board / shade color illusion. in case you doesn't want to go to youtube and search, here's the video
what the heaven and earth are you talking about? yes, i'm getting there about photo, just understand this concept for a moment and read again, the white object you see is not really "white", it's our eyes that "think" that it is white.
so, if you take a picture of a white object, don't be afraid to make it a little bit "grey", why? because that's how you can see and read the shape of white object.
white on computer (for me) is absolute pure white (maybe purest), so if you still insist on making you object white, you won't be able to compete with the white (like fighting the god of white).
taking a white object is best use a back lighting, so camera will read as it is and make fore object a bit darker (like making a sunset silhouette).
ok, enough talk, i think it's time to me to introduce the object i need to shot.


 take multiple exposure photo, then edit later. this will be hard to trace or mask. you can overlap the photo, place the brighter photo on top and add mask, then erase the feather part to reveal the darker photo, this will make the feather a little bit shown.


you can use other method such as level with mask, first is use mask on top, make the background white and erase parts that need to be darken.

here are other example when i only have 1 photo (different than taking multiple photo with different exposure), as you can see here, i use level for whitening the background, because it is necessary to have white background.

red circle means that the details on that area is lost because it is too bright.

so you want to do is erase the level adjustment layer only a bit, with 10% brush opacity on the edge of the feathers.

 below is another example of using this method, this is different items.


this is not perfect, because we use manipulation software to achieve this, the best method is use the right equipment to take this kind of picture. and i don't have any of it. maybe this was for emergency use only...
that's for now, i hope you like this post.
but, i have a different setup here, in my office, there's literally none, no studio nor space available to make that setup. so don't be discourage, i'm here to help for those who have trouble taking product photography indoor, office or home.
please read the post well, there's something that i need to talk about and i promise i'll be funny :).
so, what am i looking for? product photography that like stock photography, plain white background and an object, specifically feather (in this post). when i search "feather photography" all the result were artistic shot of a feather, so i'm search "white feather on white background" and found several photo that actually darken the feather.
white object is not really "white", it's our eyes that "think" that it is white. because our eye use "average metering" :), in term of dslr.
we calculate the surrounding color and light to make the color for the object we focus on. this calculation is actually use in some eye optical illusion, it think it's called chess board / shade color illusion. in case you doesn't want to go to youtube and search, here's the video
what the heaven and earth are you talking about? yes, i'm getting there about photo, just understand this concept for a moment and read again, the white object you see is not really "white", it's our eyes that "think" that it is white.
so, if you take a picture of a white object, don't be afraid to make it a little bit "grey", why? because that's how you can see and read the shape of white object.
white on computer (for me) is absolute pure white (maybe purest), so if you still insist on making you object white, you won't be able to compete with the white (like fighting the god of white).
taking a white object is best use a back lighting, so camera will read as it is and make fore object a bit darker (like making a sunset silhouette).
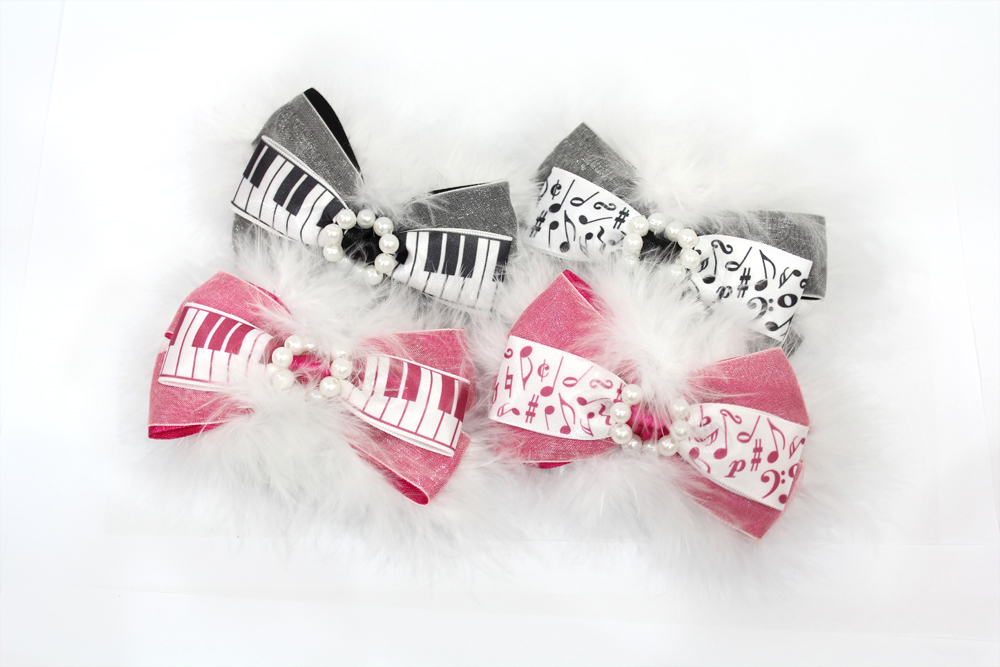
ok, enough talk, i think it's time to me to introduce the object i need to shot.

yes! it's a hair pin, cute product, isn't it? and my problem is the
background cannot be move or using a back light. so my solution was:


you can use other method such as level with mask, first is use mask on top, make the background white and erase parts that need to be darken.

here are other example when i only have 1 photo (different than taking multiple photo with different exposure), as you can see here, i use level for whitening the background, because it is necessary to have white background.

red circle means that the details on that area is lost because it is too bright.

so you want to do is erase the level adjustment layer only a bit, with 10% brush opacity on the edge of the feathers.


this is not perfect, because we use manipulation software to achieve this, the best method is use the right equipment to take this kind of picture. and i don't have any of it. maybe this was for emergency use only...
that's for now, i hope you like this post.
No comments:
Post a Comment